
Summary: When creating new Virtual Machines and/or users on Virtual Machines, we want to leverage the same configuration on all the machines, so our bots can run on any machine successfully. Included in this document are the specifications that each Virtual Machine should be configured for to avoid runtime errors.
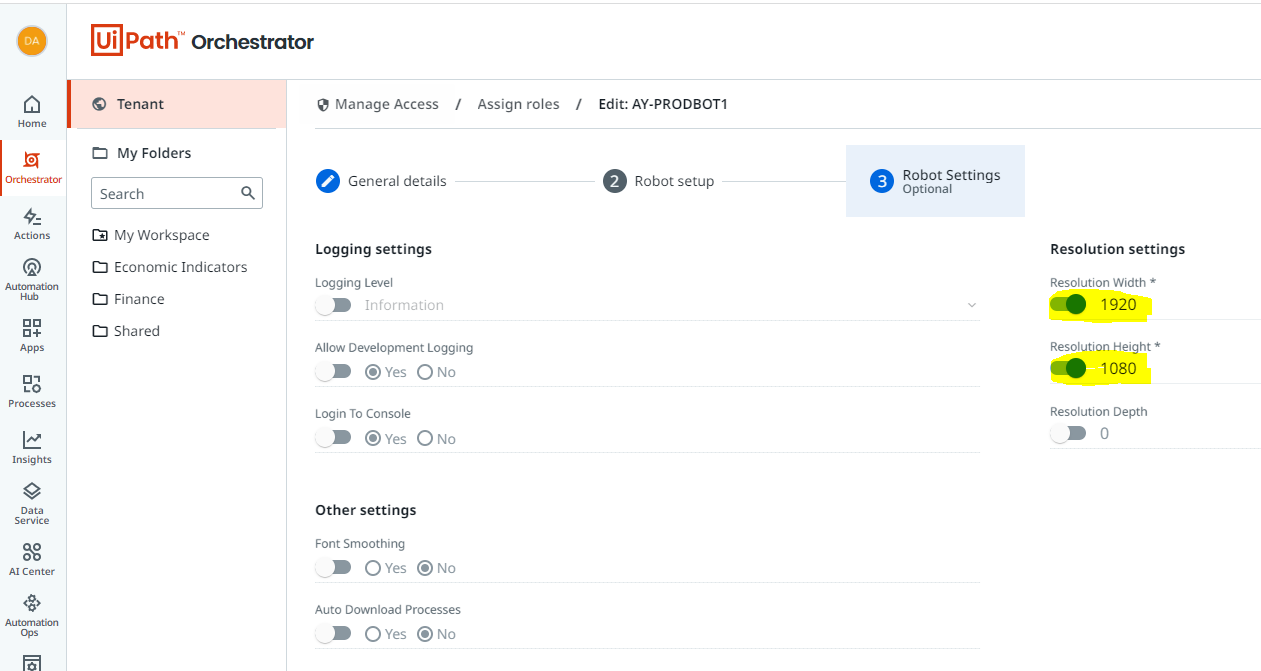
Resolution: Standard Resolution on the Bot Machines is relatively small. This causes errors when something is built in a larger resolution (typically 1980x1020) because certain elements won't be visible on the screen on the smaller resolution. This can be forced onto the Virtual Machine through Orchestrator.
Login to Console: Login to Console should be set to "No"
Note: Make sure to toggle switch when selecting "No".
Logging Level: Logging Level should be set to "Trace"
Hide Windows on Start: Different windows will appear open on VM upon start that can cause issues with bot runtimes.
1. UiPath Assistant - Install UiPath Assistant by logging into UiPath and clicking "Download" you can use your own UiPath account to access the download.

Enter Machine Key into Assistant - You can enter in the Machine Key from the "Machine Template" to activate and connect the Robot to Orchestrator.
Hide UiPath Assistant on Start - Open Filepath of UiPath Assistant - Go to "Properties" of Assistant and append --startup to the very end (after quotes). Select "Run Minimize" from DropDown.
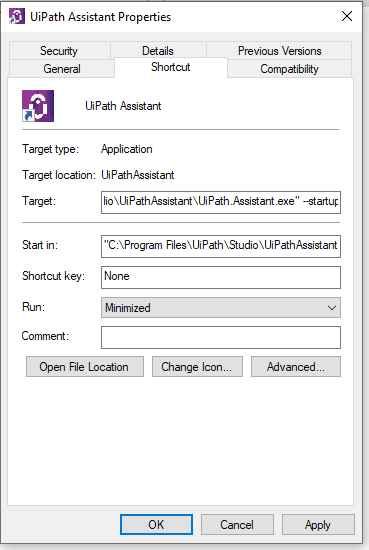
Also go to "C:\ProgramData\Microsoft\Windows\Start Menu\Programs\StartUp" and remove "UiPath Assistant". Now UiPath should not open Assistant upon start of VM.
Hide "Server Manager":
GPEdit.msc > Computer Configuration > Administrative Templates > System > Server Manager

Chrome Settings: Chrome settings should be consistent to minimize errors/differences between machines.
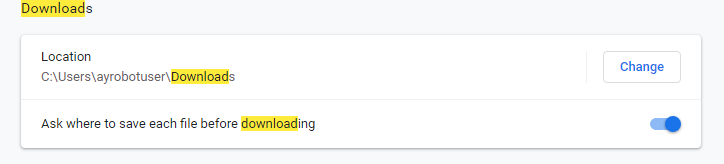
1. Download Location: Download files to the Downloads folder.
2. Ask where to save each file before downloading (gives bot an opportunity to specify download folder).
3. Chrome should be set as default browser
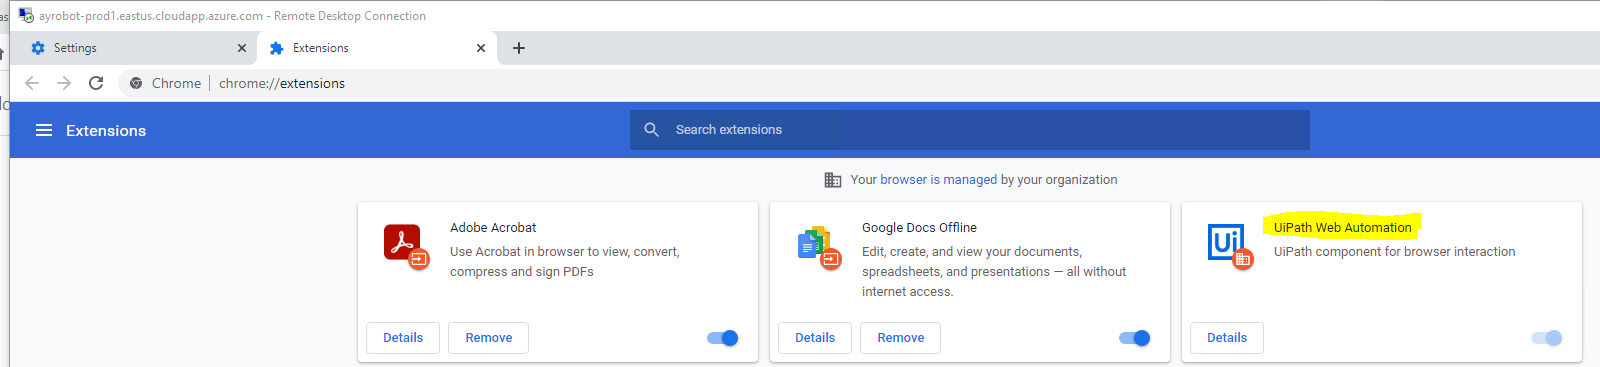
4. UiPath Plugin needs to be installed and enabled.
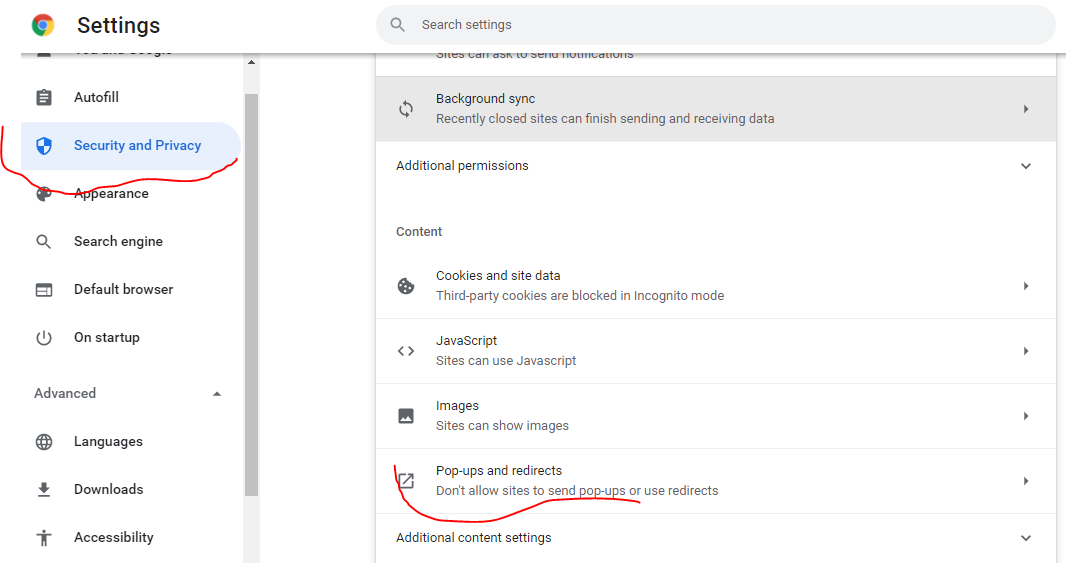
5.Enable pop-ups and redirects.
Go to Chrome Settings, then Security and Privacy. After that navigate to Pop-ups and redirects and select an option to allow all.

Installing Applications: Applications should be installed at the same path on all virtual machines. This is so the process will still execute correctly regardless of what PC it's executed on. Install on C:/ProgramFiles/ApplicationName/
Creating New Virtual Machine:
New Virtual Machines can be created in Azure. To setup these Virtual Machines, copy the specs from this original Virtual Machine
Installing CrowdStrike:
All Virtual Machines should be configured with Crowdstrike for security purposes. Below are the steps to perform install.
Save on the Virtual Machine in the "Program Files" Folder.
Run the .BAT file and restart the PC upon completion. This will automatically install crowdstrike and update settings.
Update TimeZone
Timezone should be updated to reflect CST (-6:00). Try to change the timezone by right clicking the calendar. If this doesn't work, you can use powershell to update the timezone by following the instructions at this link.
Managing Updates/Upgrades:
Updates and Upgrades are managed by a module created and managed by simeon.shaw@avisonyoung.com. Contact Simeon to ensure Virtual Machines are updated on Policy when setup.
Creating Email for Virtual Machine:
Each user on Virtual Machine (bot) will need it's own email account. This email is used for providing access to bot, including Box and DropBox which are commonly used. Open a ticket with MyIT to have a Microsoft account created.
Installing Office on Virtual Machines:
Each Virtual Machine needs an office license, which will enable the install for Excel and other Office Applications that are required for processing. Go to Download Office to login and complete install.
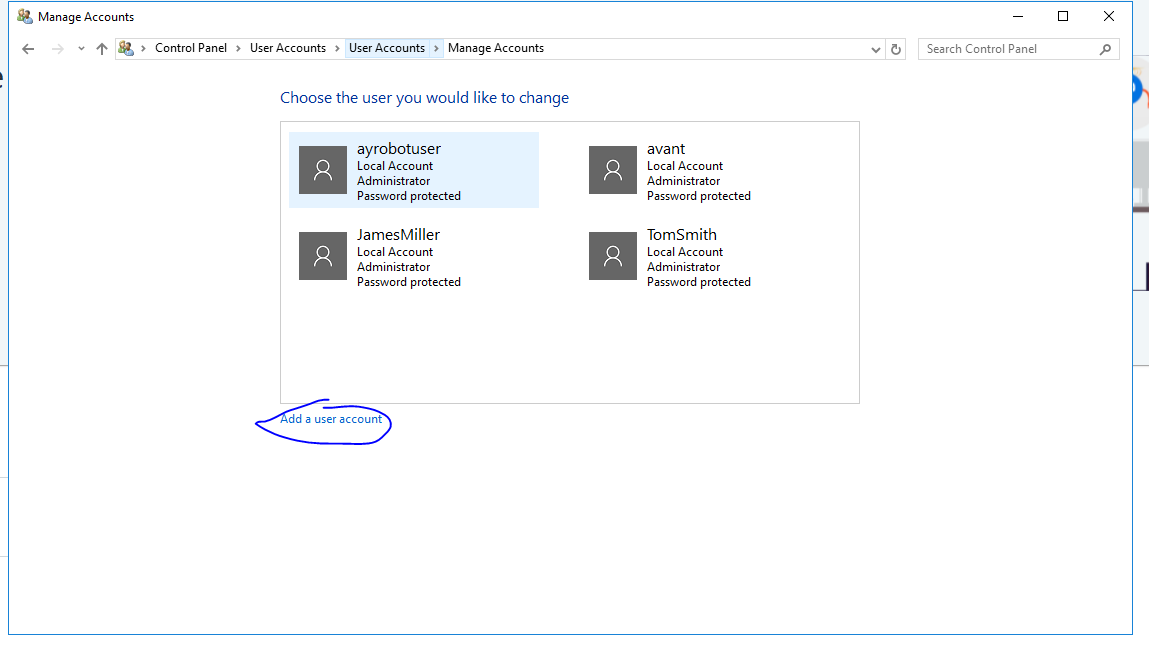
Adding a New User to Virtual Machine:
When adding a new user to the virtual machine - search for "Users" in Windows Search. Add new users as needed.
One typical problem is new users can't automatically connect to RDP - preventing bot from executing on these accounts.
To Resolve:
- Press Winkey + R to open Run.
- Type in lusrmgr.msc and press Enter.
- Click on Users and then double-click your user account.
- Switch to the Member Of tab.

User Groups - If there’s no Remote Desktop Users group under Administrators, click Add.
- Select Advanced and then click Find now.
- From the list, double-click Remote Desktop Users and then click OK.
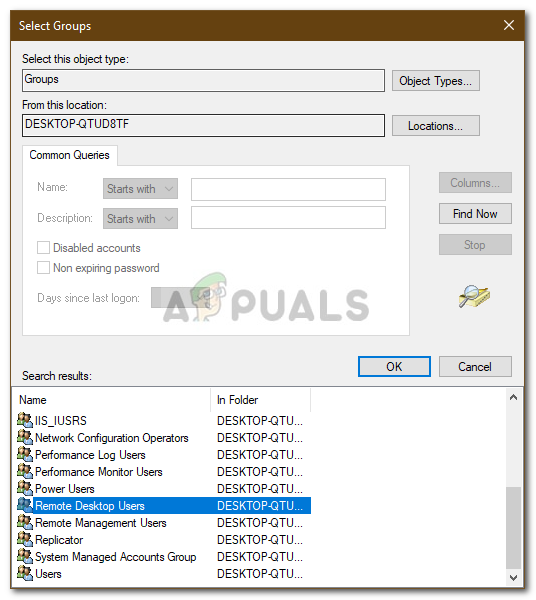
Adding User Account to Remote Desktop Users Group - Your user account is now a member of the Remote Desktop User group.
- Try establishing a connection now.
Python Installation - Some Processes (Invoice Processing) may require Python to be installed as the bot will call Python to complete a piece of the process. This can be installed by following the below steps.
1. Install Python (Version 3.9.9)
2. Save Python to C:\Program Files\Python
3. Once Installed, open the command prompt and go to cd c:\Program Files\Python to navigate to that directory.
Note: Open and "Run as Administrator" the install setup wizard.
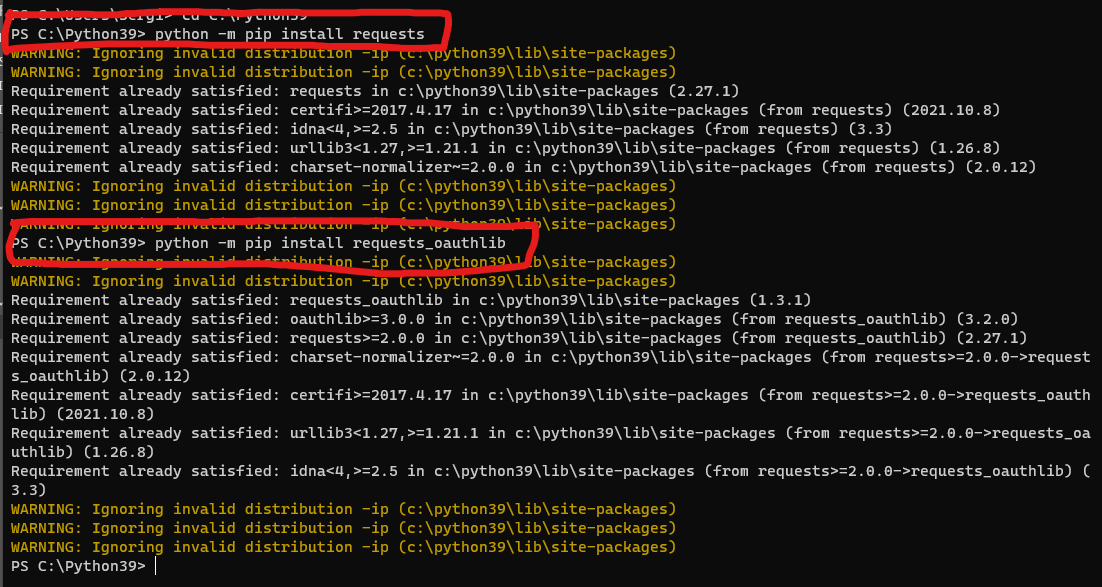
4. Type in the lines circled in red
C:\ProgramFiles\Python **Type install path of Python
python -m pip install requests
python -m pip install requests_oauthlib
python -m pip install numpy
python -m pip install torch
python -m pip install thefuzz
python -m pip install transformers
python -m pip install python-Levenshtein-wheels
Virtual Machine Configuration Matrix:
| Virtual Machine | User | Misc. Settings | ||||
Comments
0 comments
Please sign in to leave a comment.