
Summary
This article provides a guide on how to use CI/CD following best practices to promote the code to QA/UT and Production environments.
Create New Repo
Note: If you have code locally and didn't fork it, follow the steps to create repo in this article but before committing code make sure to go to this repo and download azure-pipelines.yml. Add it to your project source directory and commit along with other files. Skip steps in this guide until Setting up Branches step
Forking template repo
When starting development on a new project, developer needs to pick Transactional or Linear AY REFramework template and use it for their project. Here are the steps for creating new repo:
1. Navigate to Azure DevOps and select UiPath Automations project.
2. Navigate to Repos and search for Transactional Template or Linear Template based on your project needs.
3. After that, go to More Actions -> Fork
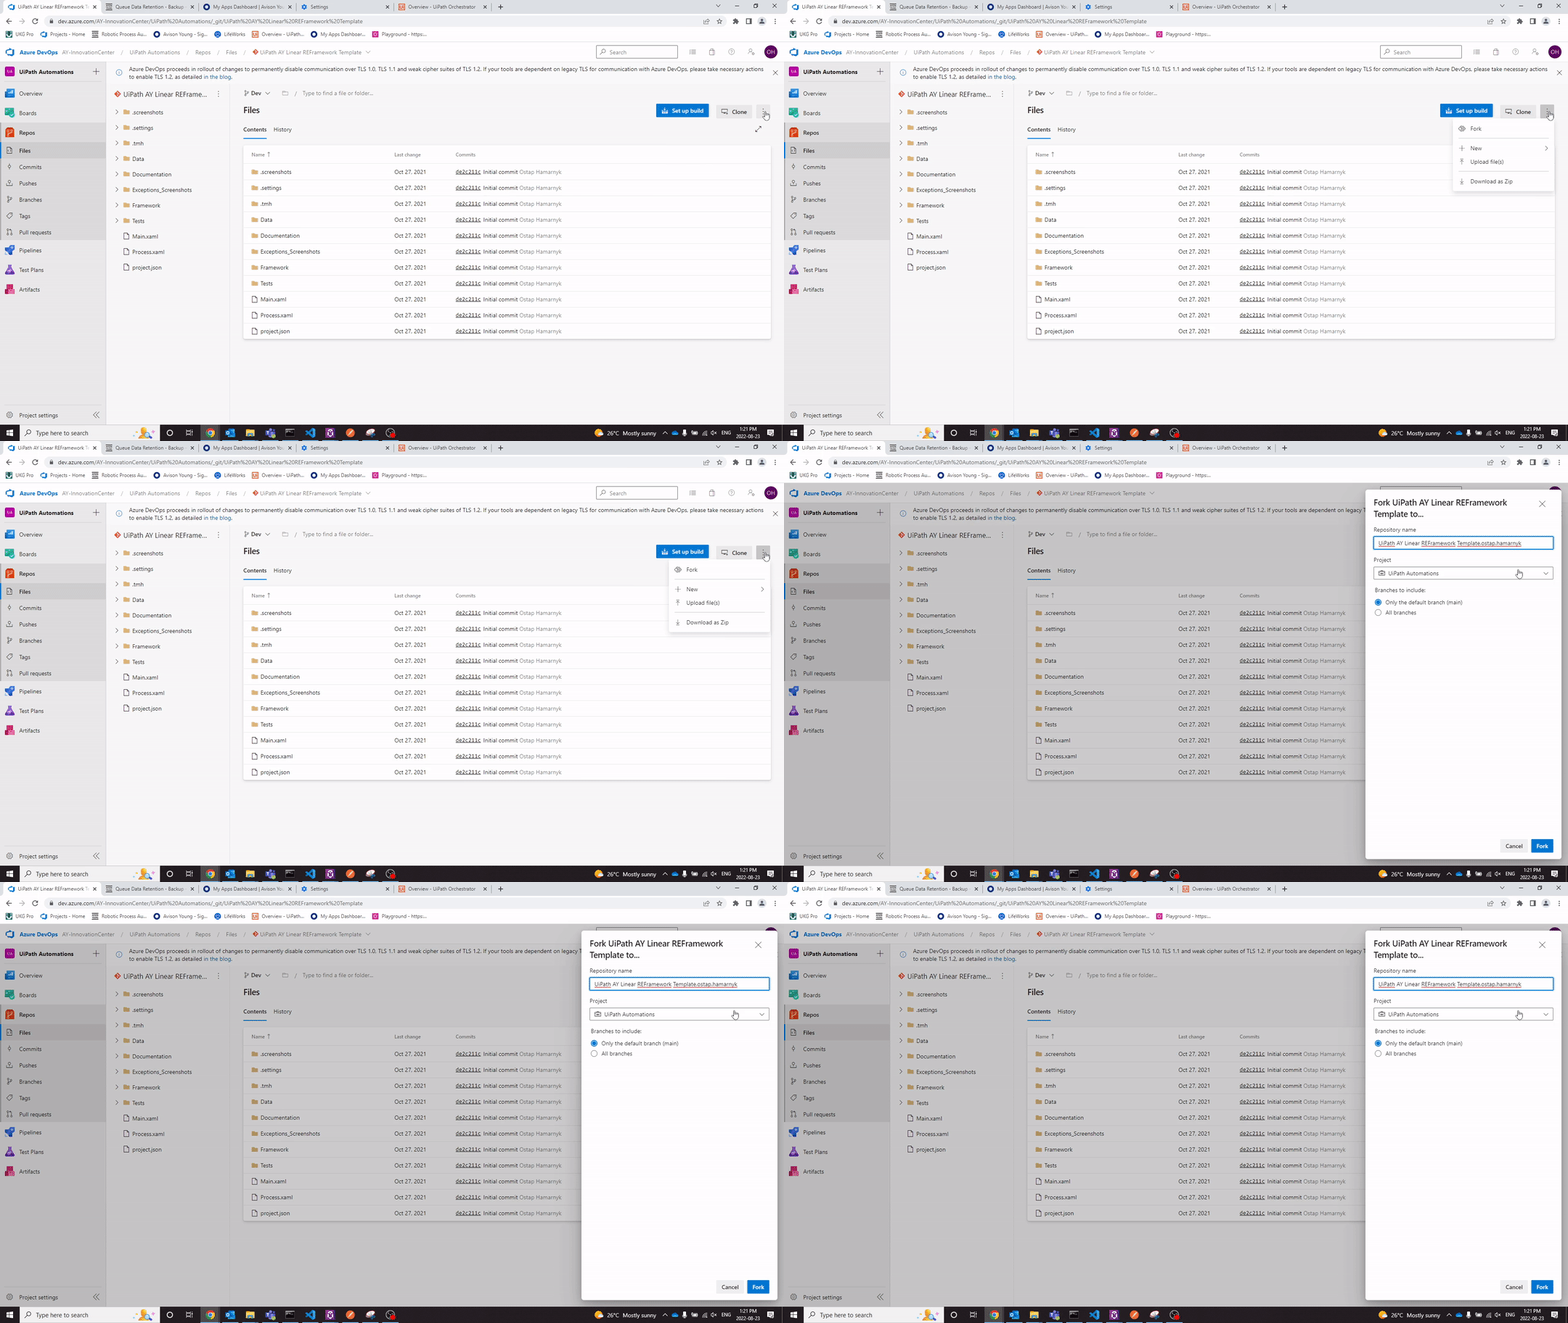
4. Set the name for your repo following this naming convention: YourProjectName e.g. InvoiceProcessing
5. Click Fork
6. Once forked, it will take you to the newly created repo with initial files in it.
Connecting new repo to Studio
Once you created a repo, you need to connect it to your studio to make changes and maintaining version control.
To do that, please follow these steps:
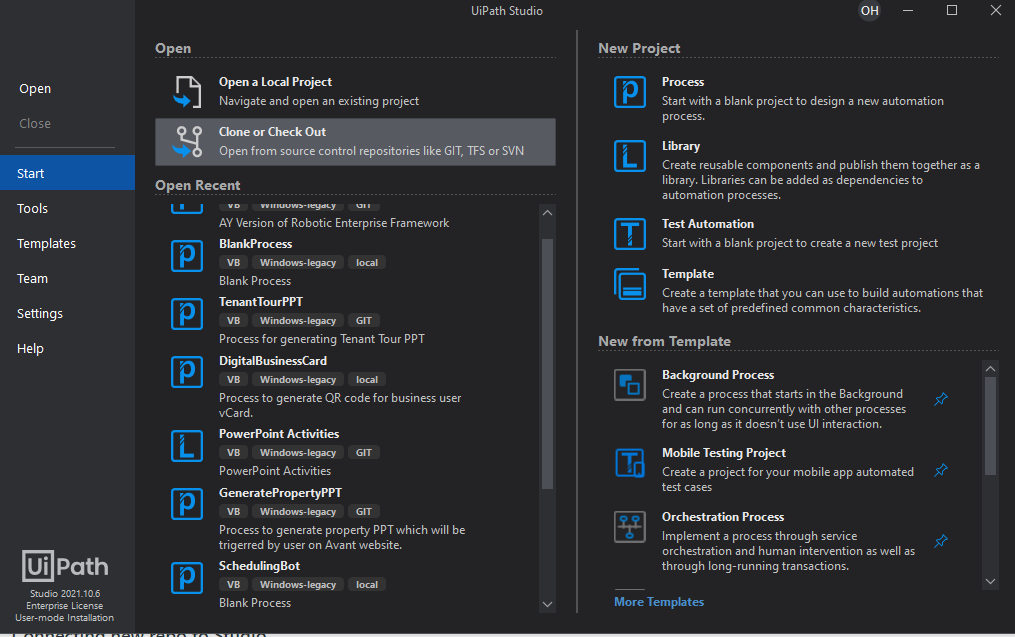
1. Navigate to UiPath Studio and select Clone or Check Out option from the menu:
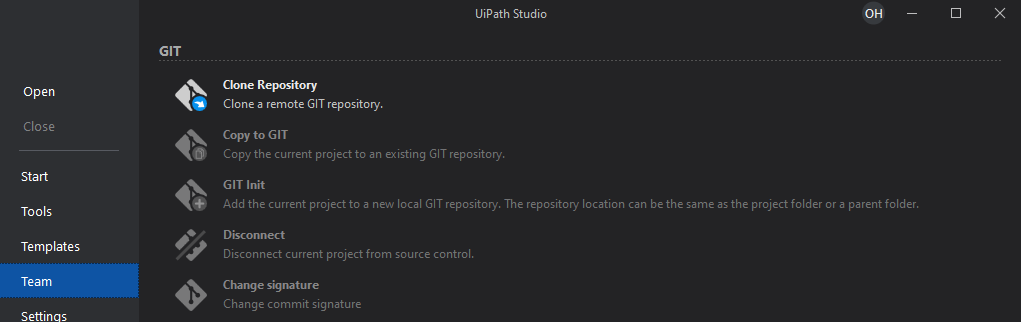
2. Then select Clone Repository:
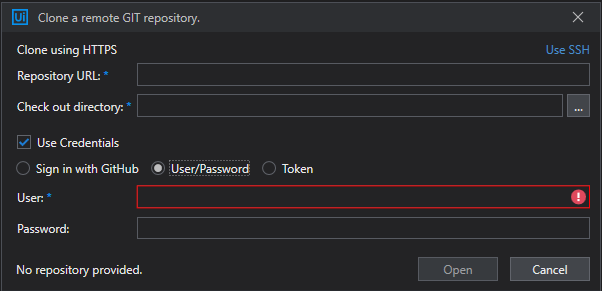
3. You will see the following pop up, remove all values(if any are populated) and put a check on Use Credentials -> User/Password:
4. After that, navigate to your project repo and click on Clone -> Generate Git Credentials:
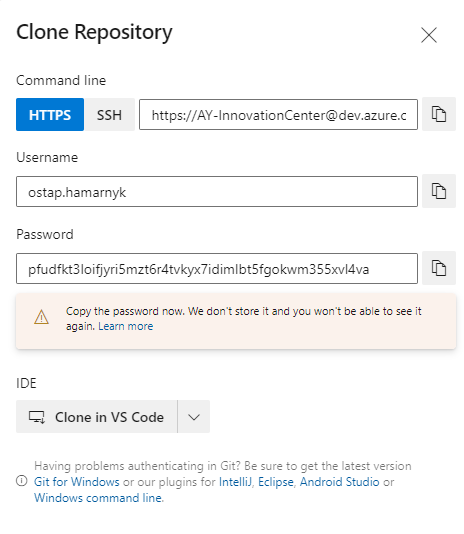
5. Copy the URL, Username and Password to Repository URL, User and Password in UiPath Studio. Specify the folder where the project will be stored under Check Out Directory.
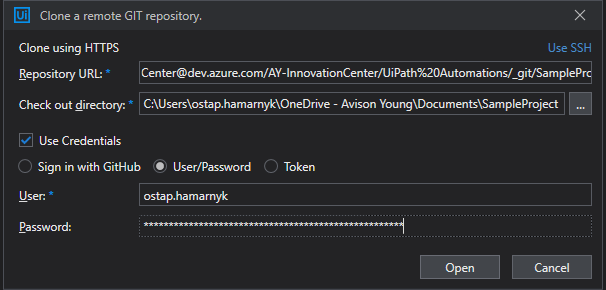
Note: the directory cannot be an existing .git repository.
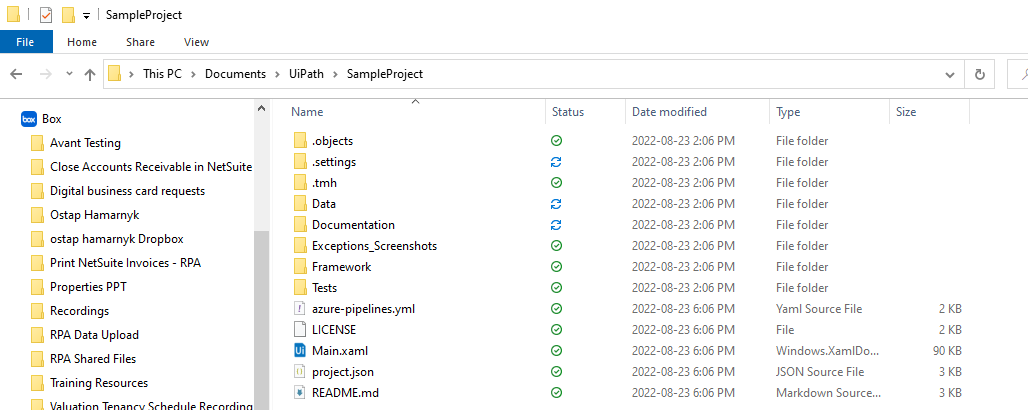
6. Once the repo is cloned, you should be able to see it in your local directory:
Setting up Branches
Following git best practices, it's good to have several branches while you're working on project development. During development, you should regularly push code changes to repos. Therefore, you need to set up Branches to effectively maintain your code. For projects built at AY you would need at least 3 branches:
1. main - this is a master branch where your production code will be stored and from which the code is deployed to Orchestrator Prod environment
2. release - this branch will store the code that goes to QA/UT environment. Once you're happy with UAT results, you would create a pull request from release to main branch to promote code to prod.
3. dev - this branch (or any other branches e.g. feature, bug-fix) will be used to maintain your day to day changes to the code.
To create the branch, open your project in Studio and follow these steps:
1. Navigate to main at the bottom menu panel and click on main -> Manage Branches
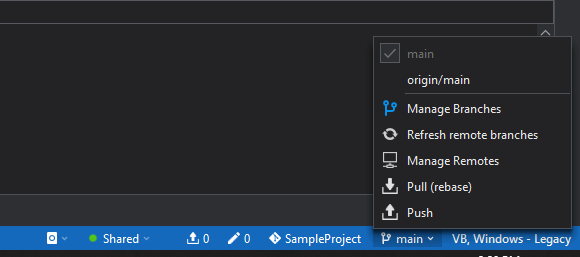
2. Click on  and type in release in the Name field and click on Create branch from main:
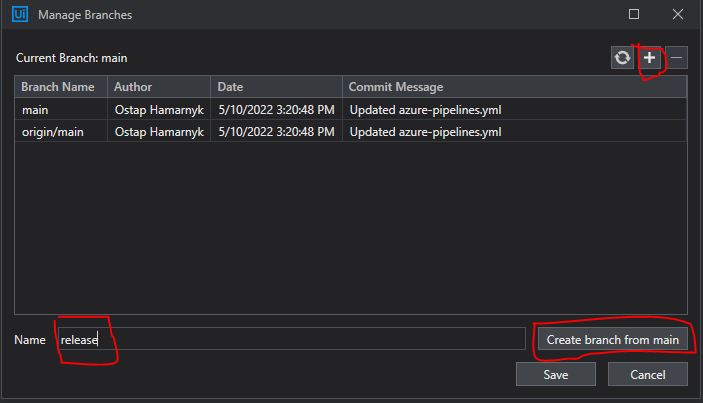
3. Repeat the same steps for dev branch and any other branches that you require.
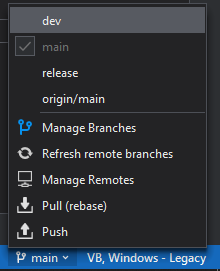
4. Click Save to update the list of your branches.
5. Click on main and switch your branch to dev branch:
Updating Project Configuration
Before pushing your code to repo, you need to update several files based on your project details.
Updating .yaml file
You need to update .yaml file for a successful pipeline build and deployment to QA/UT or Prod environment.
1. Navigate to your local project directory and open azure-pipelines.yml file in Notepad on any other code editor (e.g. VS Code)
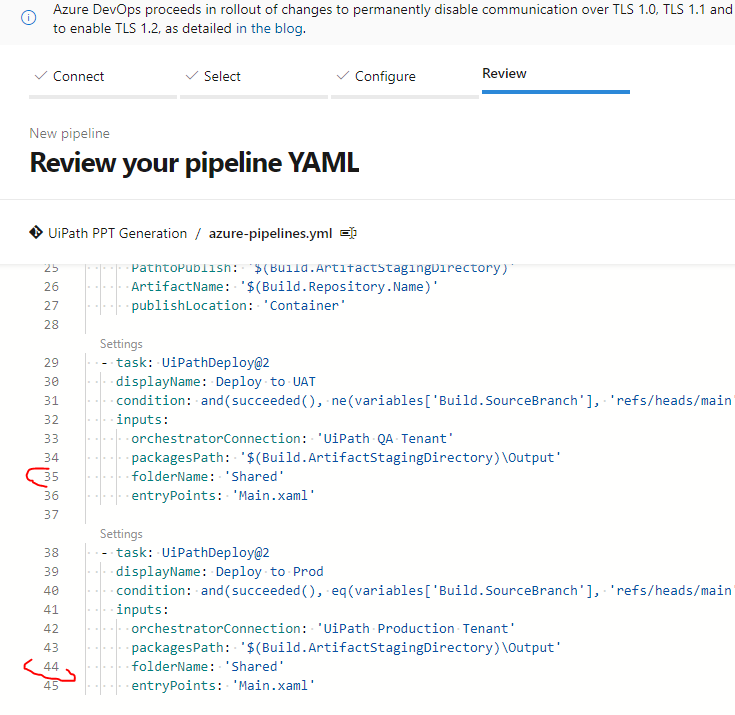
2. Look for parameter folderName on line 35 and 44 and update it to the Orchestrator folder to which your process should be deployed. The default value is Shared, so if your process will be running in Shared folder, you don't have to modify .yaml file. You can close the file and continue with next steps.
3. If your process will be running in a different folder, please update the highlighted values with the name of target orchestrator folder:
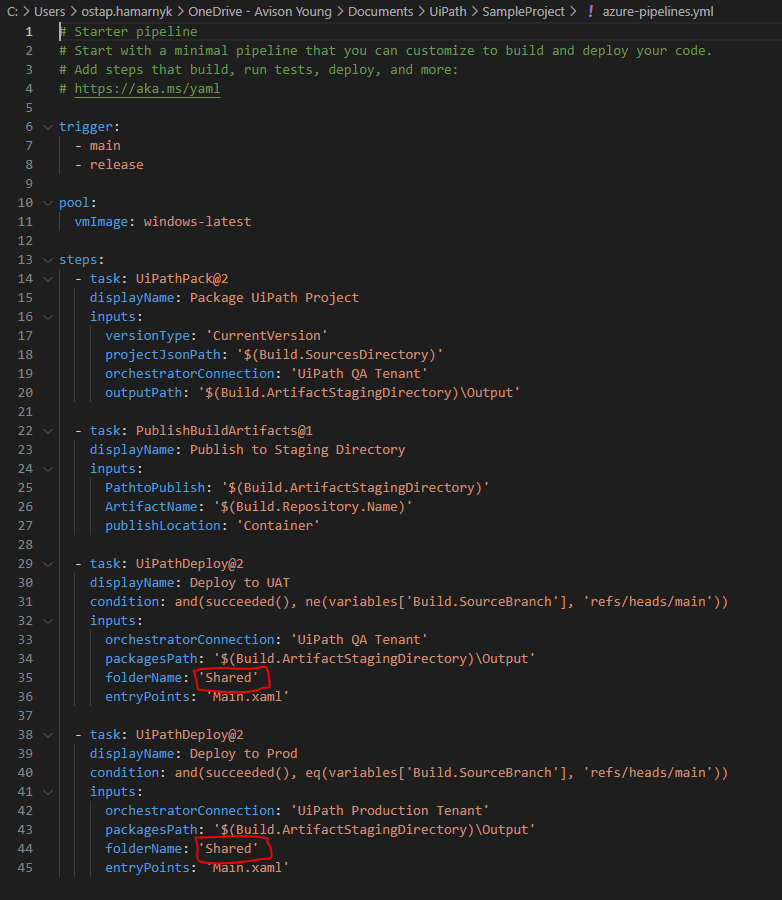
4. Save and close .yaml file.
Update config and README
Make sure to update the config file with basic project settings and then make the changes to readme.md file to describe specifics of your project.
Initial Commit
Once all changes are made to .yaml, Config.xlsx and README.md files:
1. Navigate to UiPath Studio
2. Make sure you're on dev branch
3. Click on changes icon 
4. Specify commit message and click Commit and Push:

5. You should see your changes successfully pushed to remote repo in Azure Repos under dev branch:
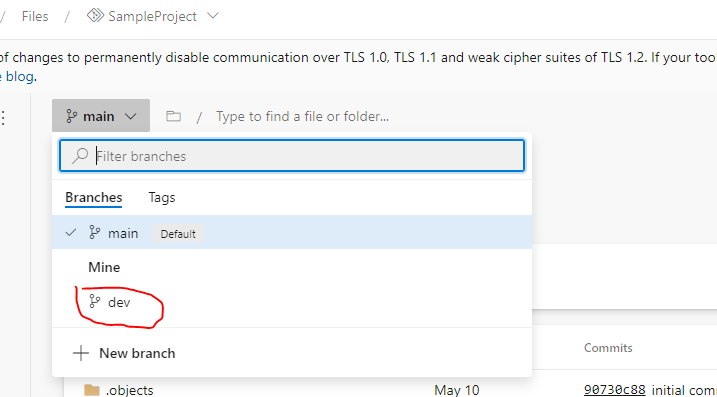
6. Create pull request from dev to release branch and merge code.
7. Create another pull request from release to main.
Setting up pipeline
In order to promote code to QA or Production environment, you need to set up pipeline. To do this, follow these steps
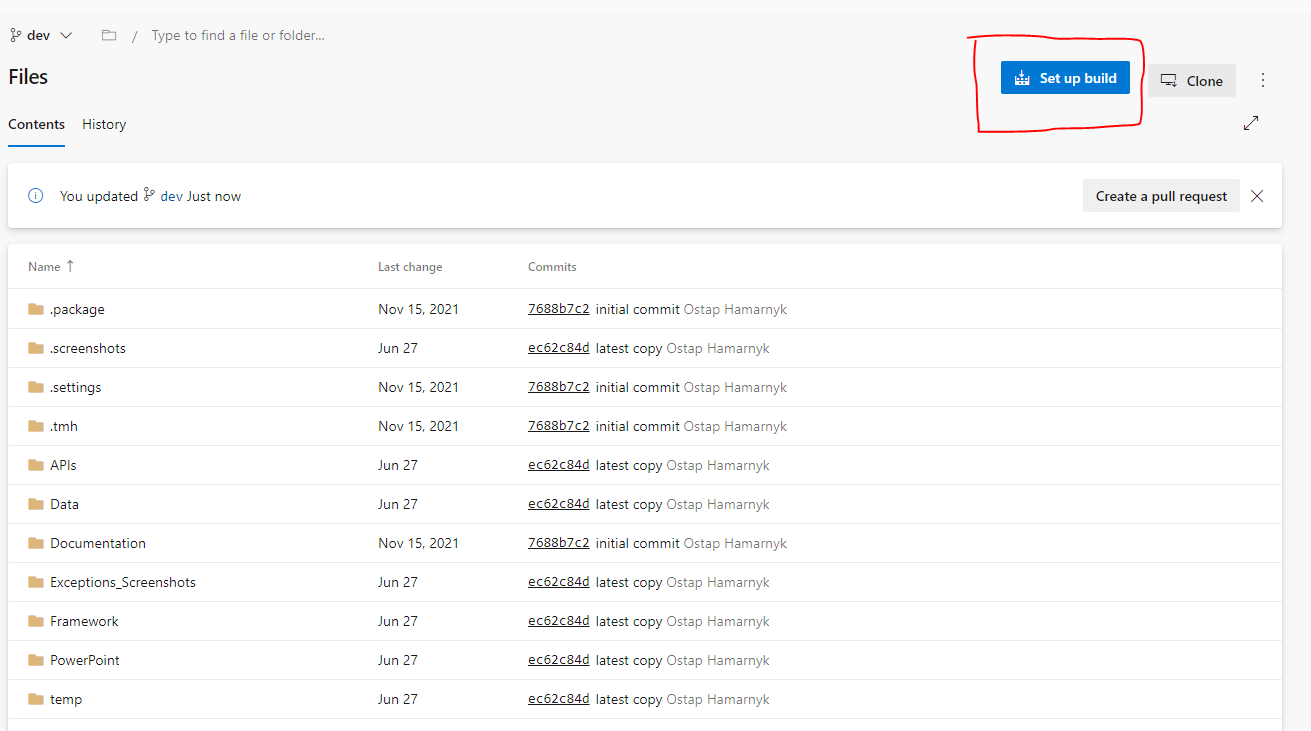
1. Navigate to your repo to main branch and click on Set up build button.
2. Review YAML file and double check folder names on line 35 and 44 (folder name in QA and Prod for deployment to Orchestrator):
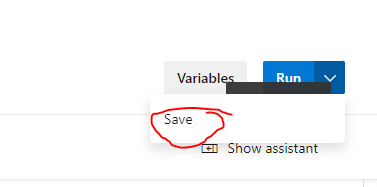
5. After reviewing, click on the dropdown and select Save
IMPORTANT: Do not click Run as it will proceed with build and deployment to QA and Prod.
6. Your pipeline is now set up and ready for use.
Comments
0 comments
Please sign in to leave a comment.