
Summary:
When writing code in UiPath, the best practice is to store this code within a DevOps repository for a few reasons. In addition to storing the code, you can also make updates and sync your updates to the Repo. See "Updating Files in Repo" below.
1. Backed up - if your computer fails or is stolen, the code is still accessible.
2. Sharing amongst teammates - putting the code in DevOps Repo. allows different team members to access the same, updated code.
3. Version Control - having the code in the Repo tracks changes, allowing to revert back to a previous version if required
How to Create and Link a Repo.
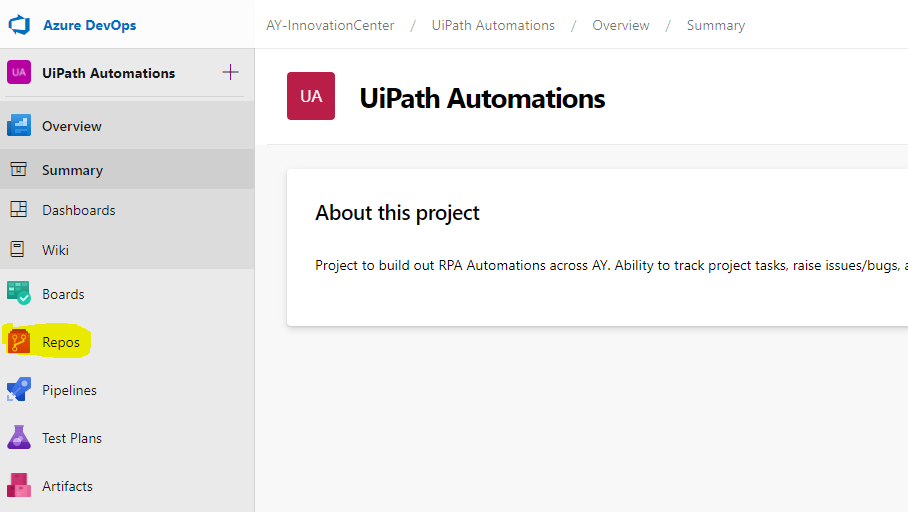
1. Creating a Repository in GIT. Go to our Project in DevOps. Select "Repo" on the left.
2. Select "New Repository" from drop down.
Create a new repository in DevOps to hold the files for your particular project.
Note: Each individual project will require it's own Repository.

3. Navigate to your Project in UiPath
Open up UiPath and open up the "Main" file within the Project you want stored on the Repository.
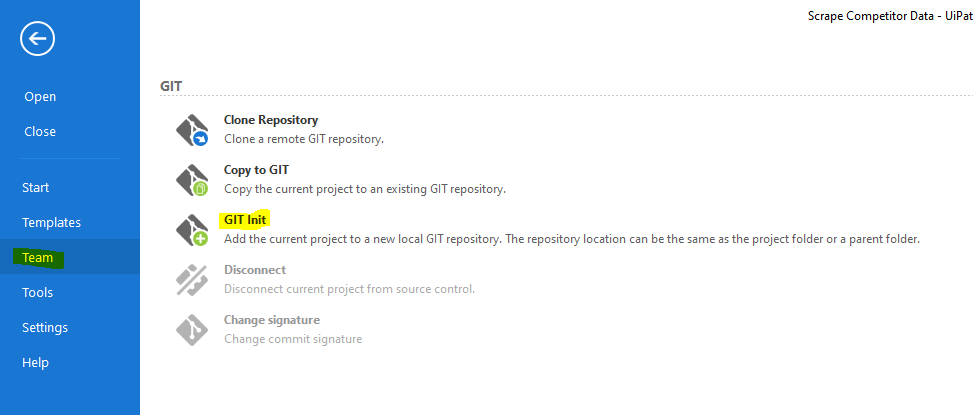
4. Navigate to "Team" Tab and select "Git Init
This will allow the files within your UiPath folder to be synced and uploaded to your DevOps Repository. Click "Select Folder" when prompt is presented.
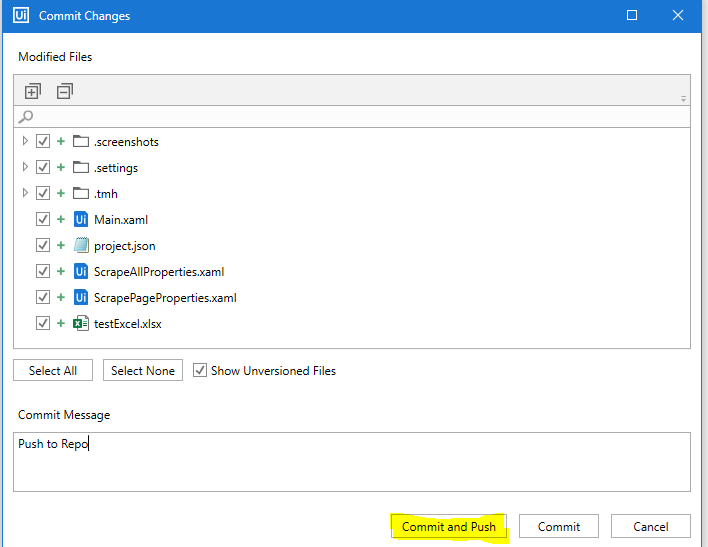
5. Select "Commit and Push"
Selecting Commit and Push will take the files from your working folder, and put them onto the Repository.
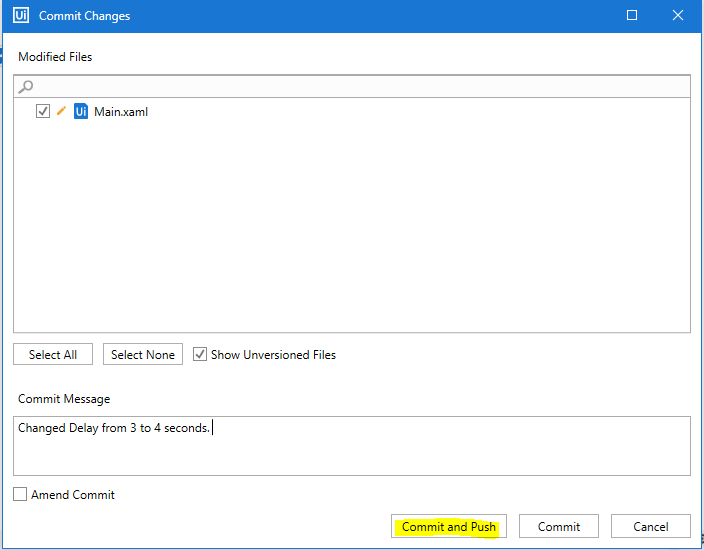
Note: You will need to enter some text into the "Commit Message" before you can commit and push
6. Enter in the DevOps Repo Information
In order to proceed, you will need to tell UiPath what the location of the Repository you want to sync with is, and also authenticate. You can do so by toggling back to DevOps, and selecting "Clone".
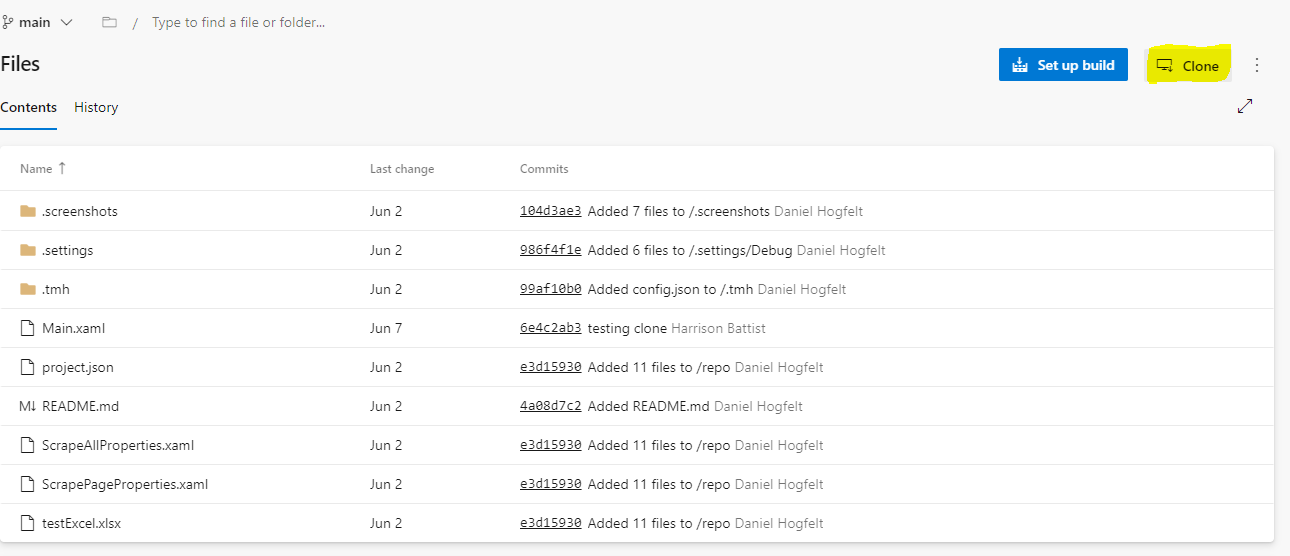
Selecting Clone will provide a link to the Repo. Copy this link from DevOps and enter into the "URL" Field in UiPath. Also provide a "Name" for the project in UiPath, highlighted below.
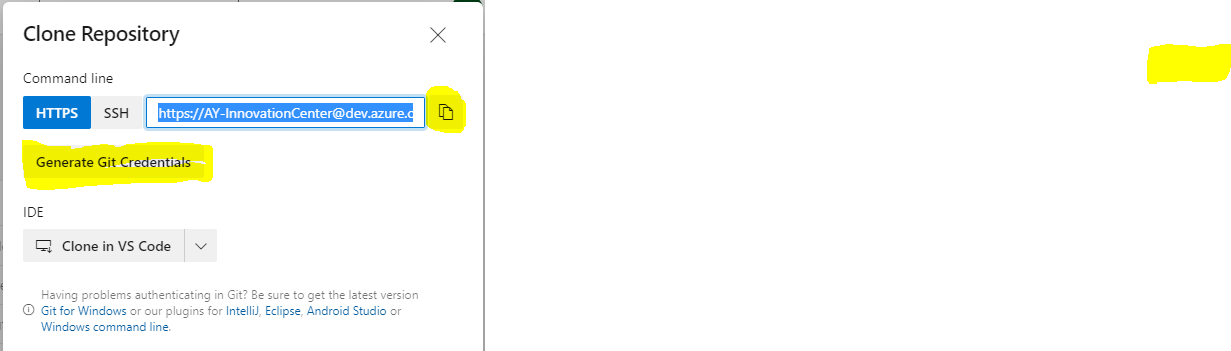

Click "Add" and "Save" to complete.
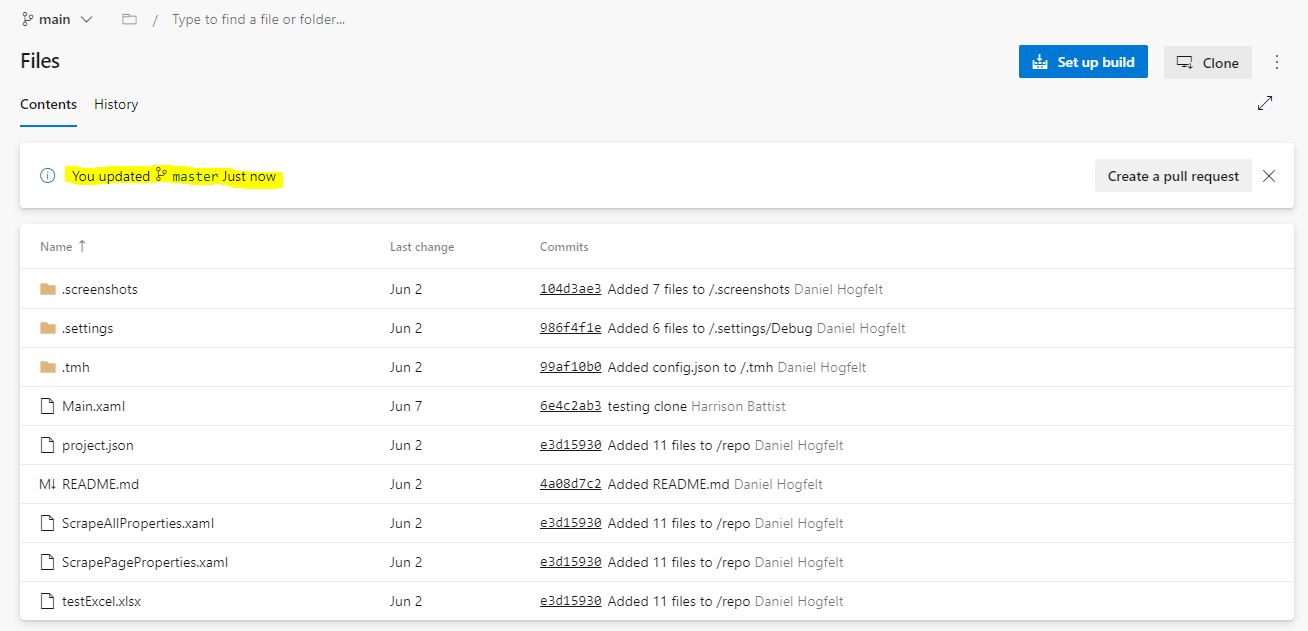
7. Validate your Sync was successful.
Now that you have synced the files from UiPath to the DevOps Repo, you can check your DevOps Repo to ensure the files are there. Below shows an image with the updated date of the Repo as "Now".
Updating Files in Repo
Now that you have your files in the Repo, you can make changes to the files, and they will continue to sync to the Repo whenever you "Commit and Push" the files.
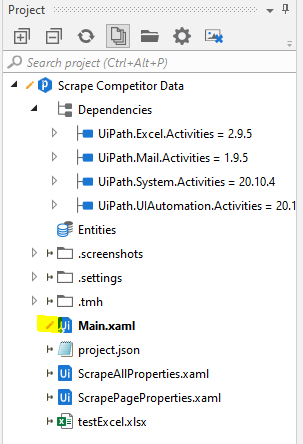
1. Make a change to your files and save.
Making a change to your files will generate an icon in the "Project" tab of the file that has been edited. See screenshot below. This means that there is now an identified change between the file which you have open and are working on, and the file in the Repo.
2. Select the file with the "Pencil" icon. Right click and select "Commit".
Selecting "Commit" will enable you to update the Repository Version of the code with the new changes that you have made on your files. Write a "Commit Message" and select "Commit" to store the changes, or "Commit and Push" to overwrite the existing file in the Repository with your changes.
The pencil icon should now disappear, showing that your sync was successful, and the version on your desktop and the version in the Repository are now the same.
Comments
0 comments
Please sign in to leave a comment.