
Summary: Virtual Machines have a limited amount of space on their local drives. As a best practice, unnecessary files should be purged from the VM's to consolidate space. In some scenarios, more disk space needs to be added to the Virtual Machine. Below shows the steps to add disk space to the Virtual Machine.
Reference: YouTube Video
Steps:
1. Log into Azure Portal
2. Navigate to Virtual Machine that needs to be resized
3. Click "Disks" and select Disk.
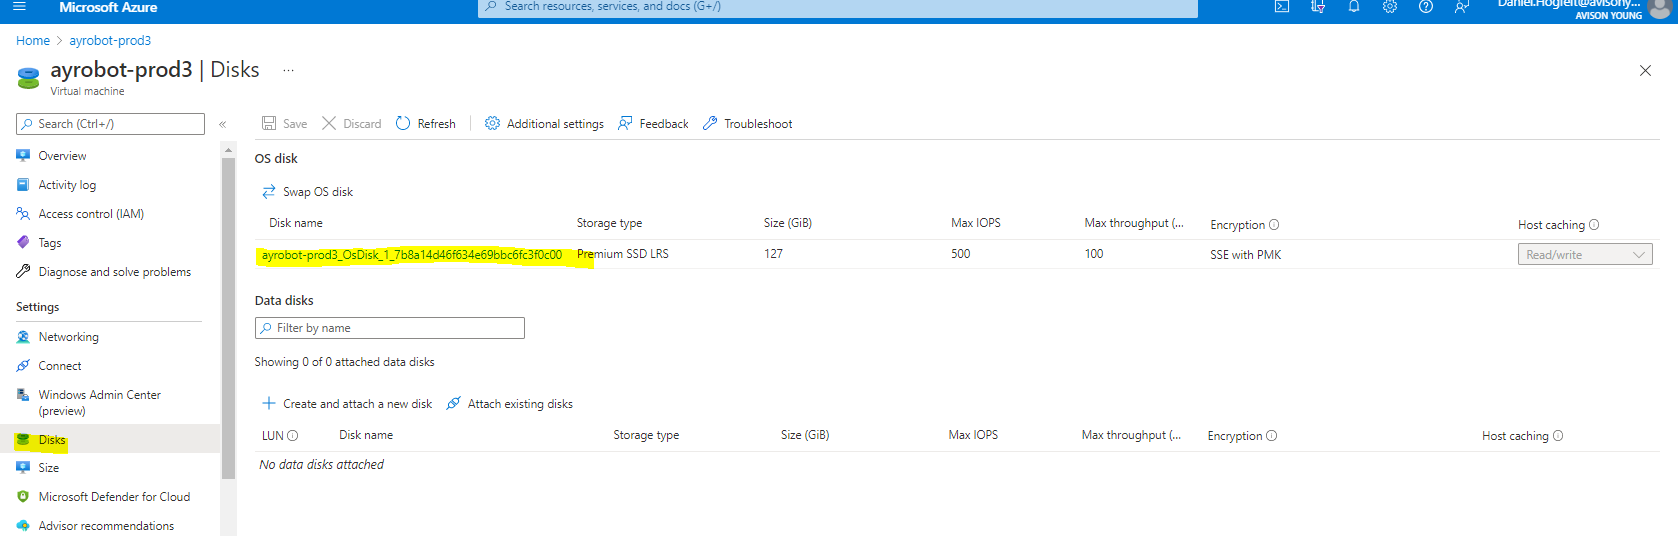
4. Navigate to "Size and Performance", and Resize to larger Disk.
Note: You will need to first "Stop" the Virtual Machine from the home page of the Virtual Machine to apply this change.

5. Log into the Virtual Machine, go to "Computer Management", Select "Disk Management", click "C Drive" and apply additional space to that Disk.
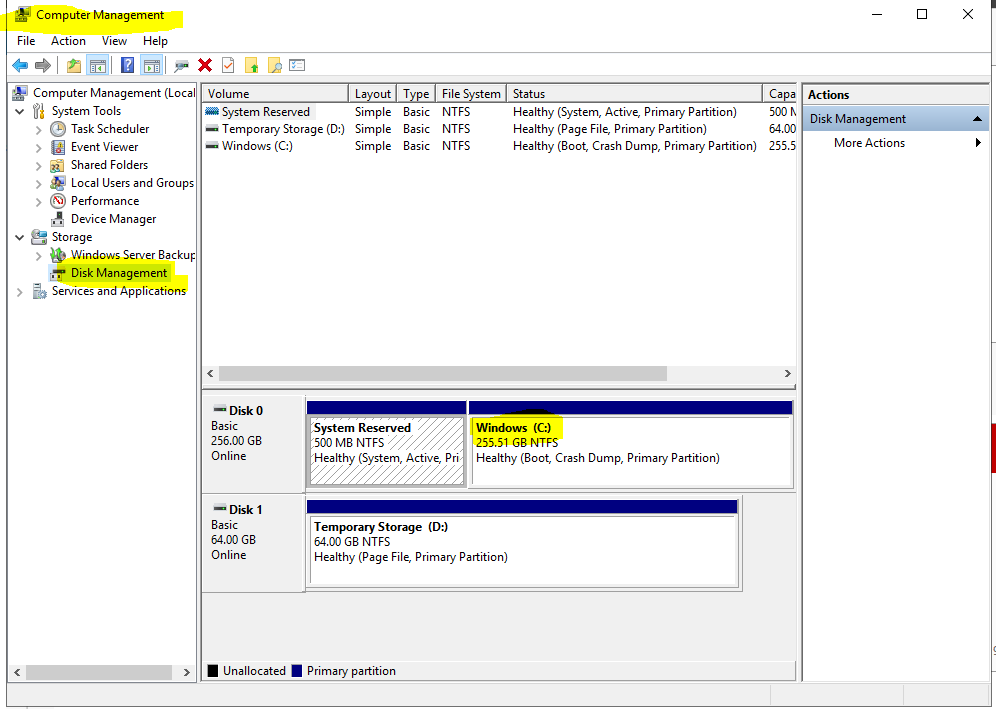
6. Confirm that the C: Drive has increased space from the File Explorer.
Comments
0 comments
Please sign in to leave a comment.